> For the complete documentation index, see [llms.txt](https://tech.x2bee.com/llms.txt). Markdown versions of documentation pages are available by appending `.md` to page URLs; this page is available as [Markdown](https://tech.x2bee.com/dev-guide/pjt-prepare/publish-your-docs/store-front-framewok-next.js/03./2.-checkbox.md).
# 2. Checkbox
이 문서는 로컬 아이콘을 사용하여 체크박스에 아이콘을 적용하는 방법에 대한 가이드입니다.
{% stepper %}
{% step %}
### 1) 로컬 아이콘 준비
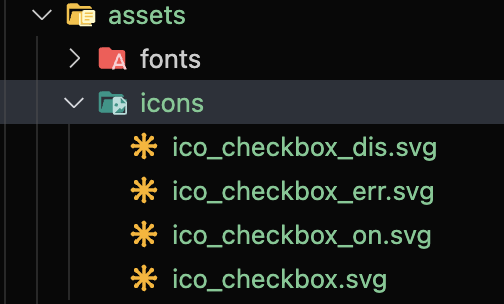
checkbox에 사용할 아이콘을 `src/assets/icons/` 폴더에 저장합니다. (폴더 이름은 자유)
{% endstep %}
{% step %}
### 2) tailwind.config.js 설정
`tailwind.config.js`에 다음과 같이 backgroundImage를 추가합니다. (경로와 파일명은 프로젝트에 맞게 수정)
{% code title="tailwind.config.js" %}
```
```
{% endcode %}
```js
theme: {
extend: {
backgroundImage: {
'icon-checkbox': "url('~/src/assets/icons/ico_checkbox.svg')",
'icon-checkbox-on': "url('~/src/assets/icons/ico_checkbox_on.svg')",
'icon-checkbox-dis': "url('~/src/assets/icons/ico_checkbox_dis.svg')",
},
}
}
```
이제 아이콘 이미지를 커스텀 유틸리티 클래스(background-image)로 사용할 수 있습니다.
{% endstep %}
{% step %}
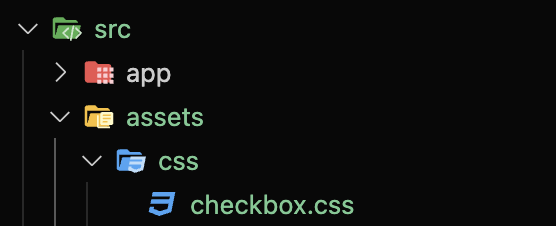
### 3) CSS 파일 분리 및 import
`src/app/globals.css`에 직접 추가해도 되지만 리팩토링을 위해 `src/assets/css/checkbox.css` 파일을 생성하고, `globals.css`에서 import 합니다:
```
@import url('../assets/css/checkbox.css');
```
```
@tailwind base;
@tailwind components;
@tailwind utilities;
@layer base {
input {
@apply appearance-none;
}
}
@layer components {
.checkbox {
@apply mx-2 inline-block h-6 w-6 shrink-0 cursor-pointer bg-icon-checkbox bg-contain bg-center bg-no-repeat align-middle checked:bg-icon-checkbox-on disabled:bg-icon-checkbox-dis;
}
}
```
설명:
* 기본 Tailwind reset에서 input 태그를 완전히 초기화하지 않으므로 `@apply appearance-none;`로 다시 리셋합니다.
* `.checkbox` 클래스에 앞서 설정한 background-image 유틸리티를 사용합니다.
### 5) 컴포넌트 내 사용 예시
React(또는 Next.js) 컴포넌트 예시:
```jsx
const CheckBox = () => {
return (
);
};
export default CheckBox;
```
{% endstep %}
{% step %}
### 6) 결과
#### local icons
checkbox에 사용할 icon을 src/assets/icons/ 폴더에 저장합니다. (폴더 이름은 자유)
 #### config
tailwind.config.js에 다음 코드를 추가합니다.
```
theme: {
extend: {
backgroundImage: {
'icon-checkbox': "url('~/src/assets/icons/ico_checkbox.svg')",
'icon-checkbox-on': "url('~/src/assets/icons/ico_checkbox_on.svg')",
'icon-checkbox-dis': "url('~/src/assets/icons/ico_checkbox_dis.svg')",
},
```
이제 아이콘 이미지를 custom utility class로 사용할 수 있습니다.
#### css
src/app/globals.css 에 코드를 추가해도 되지만,
refactoring을 위해 src/assets/css/checkbox.css 파일 생성하고,
src/app/globals.css에서 import 합니다.
`@import url('../assets/css/checkbox.css');`
다시 checkbox.css로 돌아와 위에서 정의한 utility class를 다음과 같이 작성합니다.
그리고 tailwind css 기본 reset css에서 input tag를 완전히 reset 시켜주지 않으므로 여기서 다시 reset 합니다.
```
@tailwind base;
@tailwind components;
@tailwind utilities;
@layer base {
input {
@apply appearance-none;
}
}
@layer components {
.checkbox {
@apply mx-2 inline-block h-6 w-6 shrink-0 cursor-pointer bg-icon-checkbox bg-contain bg-center bg-no-repeat align-middle checked:bg-icon-checkbox-on disabled:bg-icon-checkbox-dis;
}
}
```
#### component내에서 사용 예시
```
const CheckBox = () => {
return (
);
};
export default CheckBox;
```
#### 결과
#### config
tailwind.config.js에 다음 코드를 추가합니다.
```
theme: {
extend: {
backgroundImage: {
'icon-checkbox': "url('~/src/assets/icons/ico_checkbox.svg')",
'icon-checkbox-on': "url('~/src/assets/icons/ico_checkbox_on.svg')",
'icon-checkbox-dis': "url('~/src/assets/icons/ico_checkbox_dis.svg')",
},
```
이제 아이콘 이미지를 custom utility class로 사용할 수 있습니다.
#### css
src/app/globals.css 에 코드를 추가해도 되지만,
refactoring을 위해 src/assets/css/checkbox.css 파일 생성하고,
src/app/globals.css에서 import 합니다.
`@import url('../assets/css/checkbox.css');`
다시 checkbox.css로 돌아와 위에서 정의한 utility class를 다음과 같이 작성합니다.
그리고 tailwind css 기본 reset css에서 input tag를 완전히 reset 시켜주지 않으므로 여기서 다시 reset 합니다.
```
@tailwind base;
@tailwind components;
@tailwind utilities;
@layer base {
input {
@apply appearance-none;
}
}
@layer components {
.checkbox {
@apply mx-2 inline-block h-6 w-6 shrink-0 cursor-pointer bg-icon-checkbox bg-contain bg-center bg-no-repeat align-middle checked:bg-icon-checkbox-on disabled:bg-icon-checkbox-dis;
}
}
```
#### component내에서 사용 예시
```
const CheckBox = () => {
return (
);
};
export default CheckBox;
```
#### 결과
 {% endstep %}
{% endstepper %}
---
# Agent Instructions
This documentation is published with GitBook. GitBook is the documentation platform designed so that both humans and AI agents can read, navigate, and reason over technical content effectively. Learn more at gitbook.com.
## Querying This Documentation
If you need additional information that is not directly available in this page, you can query the documentation dynamically by asking a question.
Perform an HTTP GET request on the current page URL with the `ask` query parameter, and the optional `goal` query parameter:
```
GET https://tech.x2bee.com/dev-guide/pjt-prepare/publish-your-docs/store-front-framewok-next.js/03./2.-checkbox.md?ask=&goal=
```
`ask` is the immediate question: it should be specific, self-contained, and written in natural language.
`goal` is optional and describes the broader end goal you are ultimately trying to accomplish on behalf of the user. GitBook uses it to tailor the answer towards what is most useful for that goal.
The response will contain a direct answer to the question and relevant excerpts and sources from the documentation.
Use this mechanism when the answer is not explicitly present in the current page, you need clarification or additional context, or you want to retrieve related documentation sections.
{% endstep %}
{% endstepper %}
---
# Agent Instructions
This documentation is published with GitBook. GitBook is the documentation platform designed so that both humans and AI agents can read, navigate, and reason over technical content effectively. Learn more at gitbook.com.
## Querying This Documentation
If you need additional information that is not directly available in this page, you can query the documentation dynamically by asking a question.
Perform an HTTP GET request on the current page URL with the `ask` query parameter, and the optional `goal` query parameter:
```
GET https://tech.x2bee.com/dev-guide/pjt-prepare/publish-your-docs/store-front-framewok-next.js/03./2.-checkbox.md?ask=&goal=
```
`ask` is the immediate question: it should be specific, self-contained, and written in natural language.
`goal` is optional and describes the broader end goal you are ultimately trying to accomplish on behalf of the user. GitBook uses it to tailor the answer towards what is most useful for that goal.
The response will contain a direct answer to the question and relevant excerpts and sources from the documentation.
Use this mechanism when the answer is not explicitly present in the current page, you need clarification or additional context, or you want to retrieve related documentation sections.